Project 2b
1. Use toposurface to create contour.


2. To create site context. Use the below Command.
Massing & Site > Model Site > Topography > Place Point
Changing the height of each layer by setting the Elevation (height).


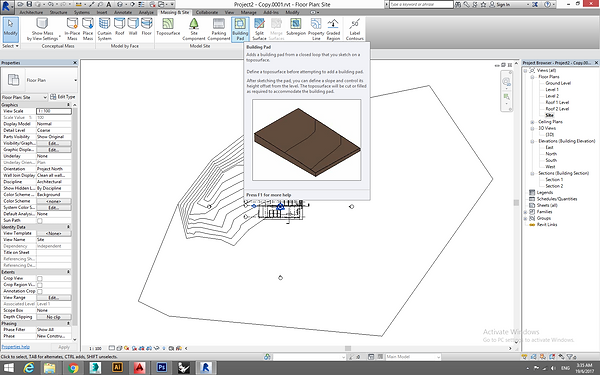
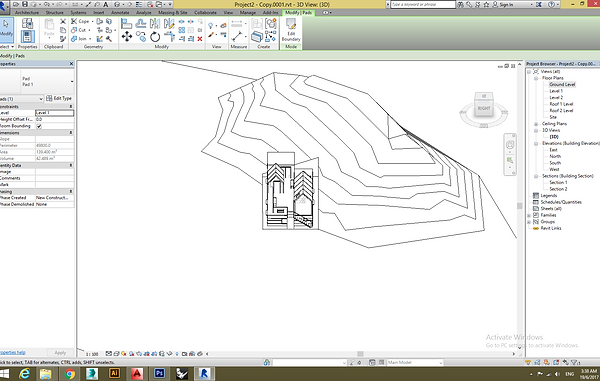
3. Sometimes the site is clashed to the building.

4. Cut holes using Building Pad>Sketch Boundary>the hole being cut.


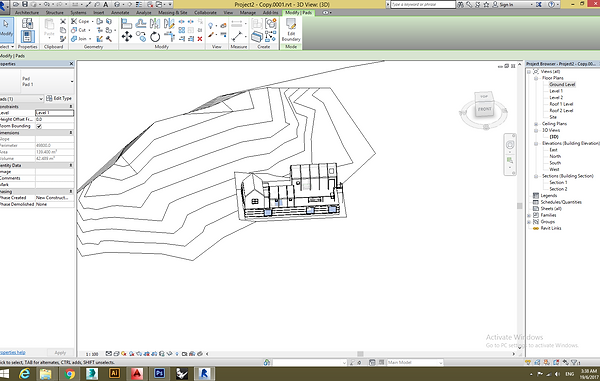
5. Massing & Site>Site Component>Place the tree.


6. Room tag is added to identify the rooms. Rm is the command short key.
Architecture > Room & Area > Room Separator (optional, if room is not defined) > Room > Select Space


7. To colour the rooms according to its function.
Go to Plan View > Architecture > Drop Bar at Room & Area > Colour Scheme > Category > Rooms > OK


8. Go edit color scheme to edit color>Color to edit color.

9. To show color scheme in plan, go to Propoerties Tab>Dolor Scheme Location>click<none>

10. Under the Category, change to spaces to rooms>click name>then click ALL the spaces in color schemes VISIBLE.


11. To show the legend, go to Annotate>Color Fill Legend>Drag the Legend to sheet.


12. Same goes to the 1st floor. Tag Room and Color Codes the spaces.


13. To create exploded isometric.
Duplicate 3D View > Switch to Desire Angle > Select Object > Modify > View > Displace Elements > Move Up

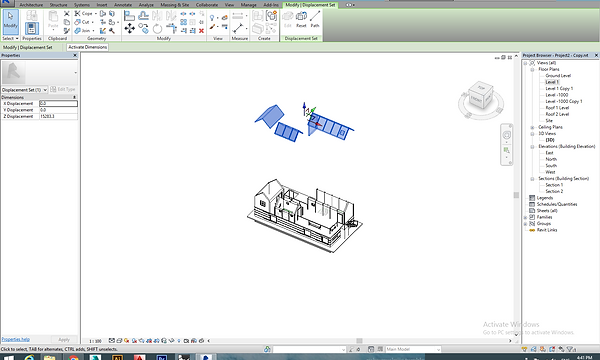

Putting and Load the furniture.


14. To create perspectives.
Go to Top Bar > Select Camera > Set Camera > Control Boundaries > Choose Desire View


15. To create title block.
File > New > New Family > Title Blocks > A1 Metric
Create > Model Line > Draw Desire Title Block
To add in details.
Create > Label Text (Auto Detect Information from Model)
Create > Text (To write fixed title or information)


16. To load file into Revit.
Modify > Load into Project
17. To insert drawings and information into drawings.
Drag Drawings into the Paper > Adjust the Location and the Size of the Drawing
To crop the size of drawing, go to Properties Tab>Extents>CLICK ALL options (Crop View/Crop Region Visible/Annotation Crop)


18. To add the area in room tag label, select the roo, tag>Edit Type>Type Properties>Tick AREA.


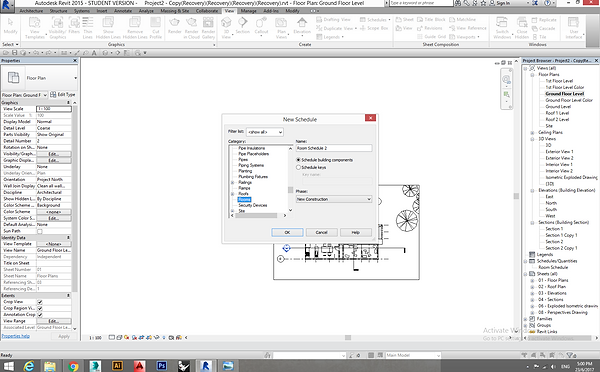
19. To create schedule for plan.
Category > Room > Schedule Properties > Add in Desire Options in Order


20. Arrange the scheduled fields by click<Move Up> & <Move Down>.


21. Put in plan detail with the Annotate>Tag by Categories.
Click on the Door & Window n Annotate them with D1(Door 1) and following type with Leader.
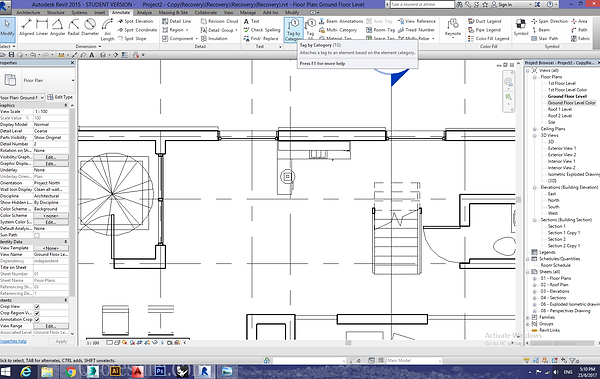

22. To speed up, click Tag All, Select the category to show tag and click LEADER.


23. The size and font size of label tag can be edited in Family.
��

24. Same goes to the 1st floor.

25. To show the opening in plans, in Properties Tab>Extents>View Range,
the Cut Plane can be adjusted to show all openings.

26. To create section for the building.
Go to Plan View > Move your Mouse to Top Bar > Click Section > Draw at Desire Cut Section.


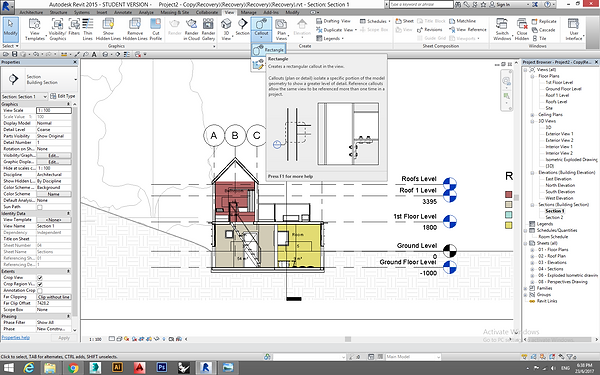
27. To create call out section for the building.
Go to Section View > View > Call Out> Rectangle > Draw at Desire Call out Section.

28. To add in details, go to Annotate>Detail Line/Insulation/Component>Draw and log the detail in the call out section.

29. To create phasing.
Duplicate the Level that needs to be Phased > Rename Plan(Demolished, Existing, New Construction)

30. To create phasing.
Manage > Phasing > Phases > Add in Demolished/Existing/New Construction

31. Change the phase filters setting as below.
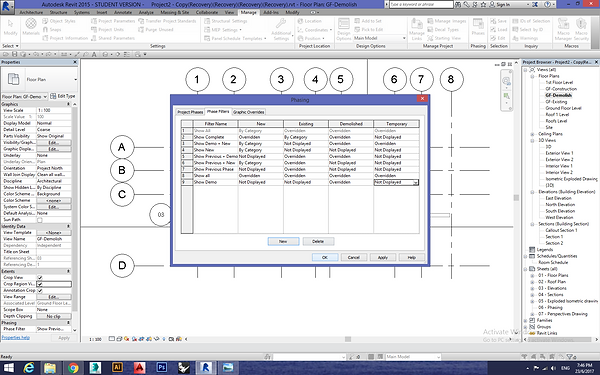
32. The graphic overrides setting as below.

33. On the original Gounod Floor Plan, all the components are selected and changed to existing for the phasing.

34. To create phasing.
Go to Phasing Existing Plan > Phasing > Existing > Phasing Filter > Show All

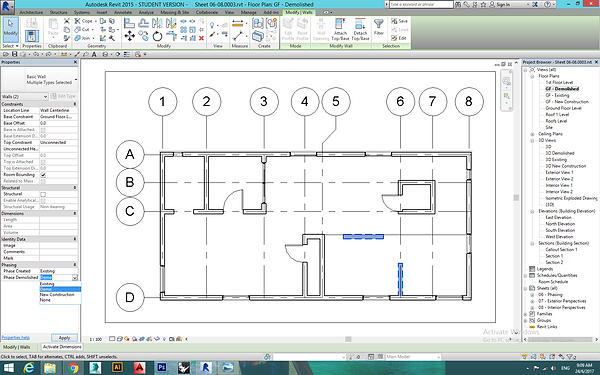
35. Go to Phasing Demolished Plan > Phasing > Demolished > Phasing Filter > Show Complete

36. Select the component that is to be demolished and change the phase to demolised,
37. Go to Phasing New Construction Plan > Phasing > New Construction > Phasing Filter > Show Complete
Create New Construct Wall > Phase Created > New Construction


38. The selected demolished component will be in dotted line

39. The new construction component will be in red outline.

39.3D Viewing on the demolished and new construction phase.


40. To produce final drawings.
Go to Sheet > Print > Select Paper Size > Print to pdf
Link below could access to my files.